BEFORE STARTING THIS PROCESS:
If its your first time signing into the PackShot PC please remember to Synchronise the "Product-General" One Driver Folder.
If Confused on what or how to do it please follow this LINK.
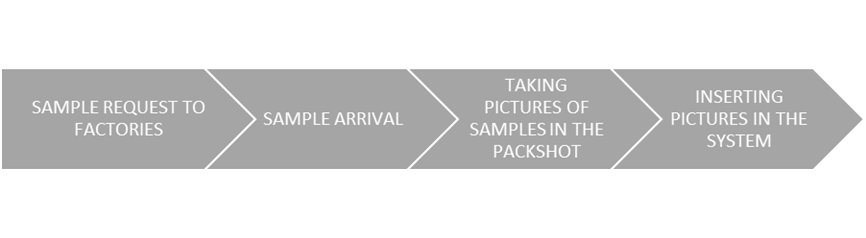
The samples are requested each season by the Product Developer. The pictures taken in the pack shot are used for multiple documents internally but are also used for the production boxes.
Process Map:
Procedure:
Requirements:
- Take 20 pictures (JPEG), one TIFF and one PSD file
- The TIFF and PSD will need to be done in Still Shot together
- Meanwhile the 20 pictures (20 SHOTS and 5 VIEWS) need to be done in Custom Defined
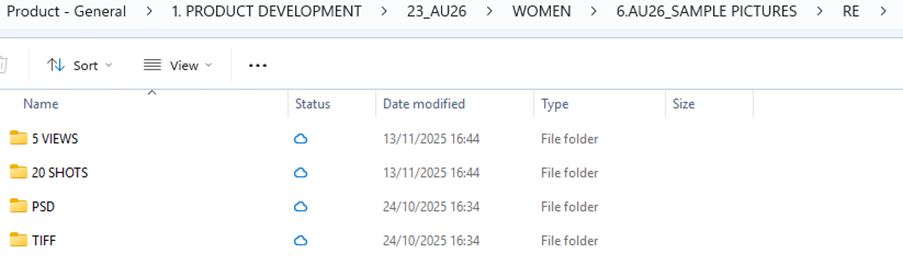
- Each season, all picture folders are divided by factory, then as followed:
HOW TO OPEN THE PACKSHOT MACHINE:
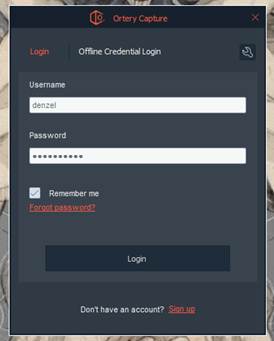
Double click on ORTERY CAPTURE icon

Insert Username and Password and tick “remember me” box – the username and password can be found on the packshot desk, otherwise, please contact IT
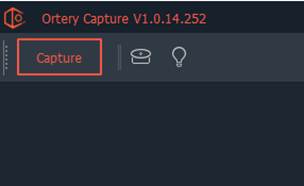
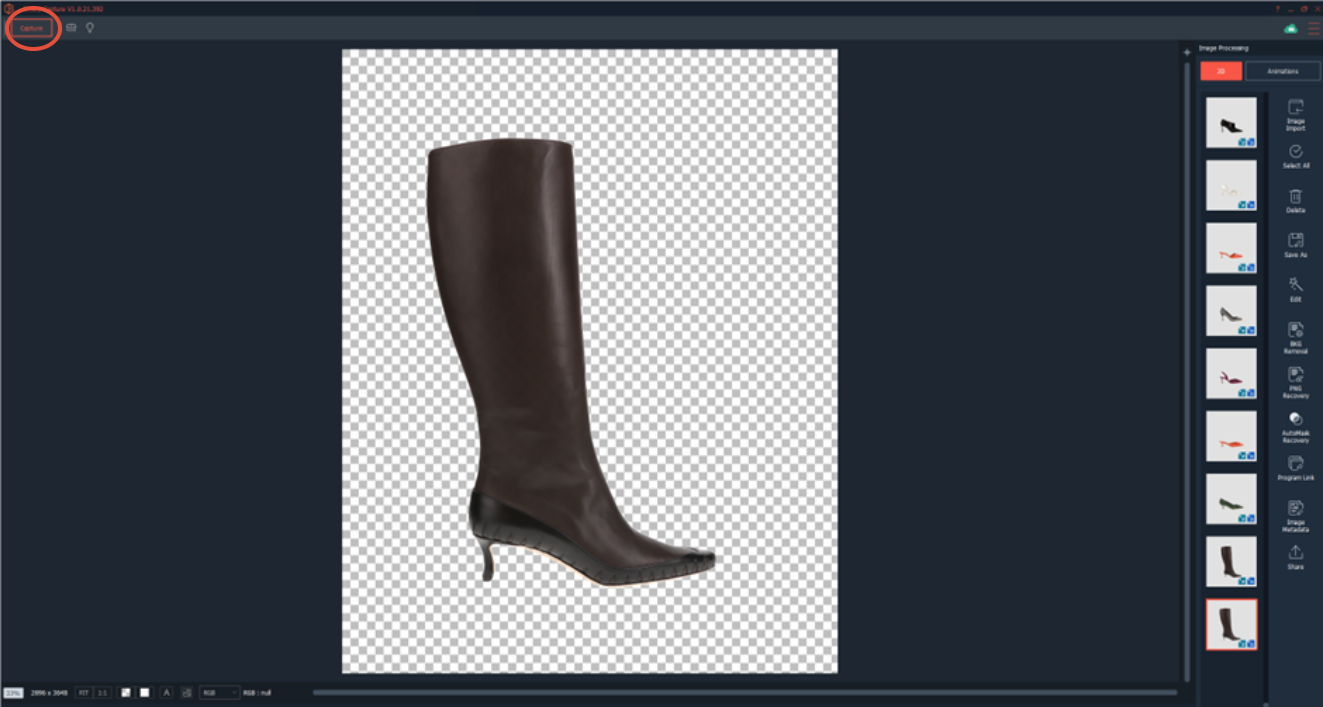
Once loaded press “Capture” on top left to access the camera mode
HOW TO ADD THE PROFILE USED TO TAKE PACKSHOT PICTURES:
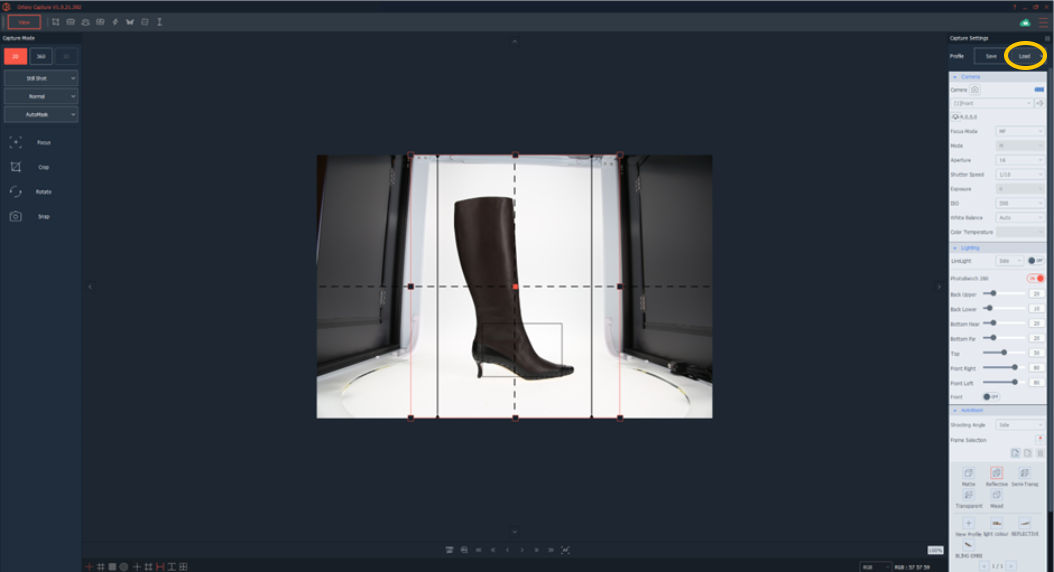
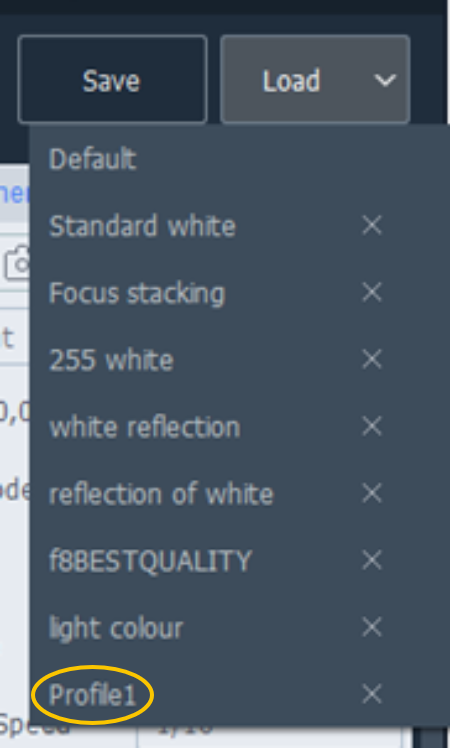
Go to the 3 lines icon on the right side
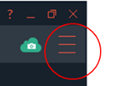
You only need to add the profile only the first time you use the Packshot, after that, it should automatically show up
Ask IT’s support to do the correct set up.
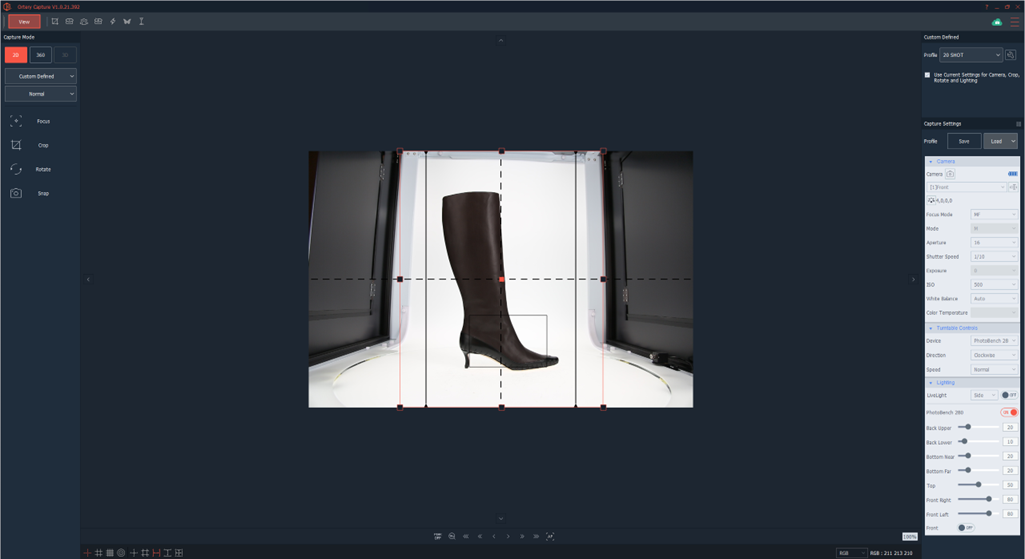
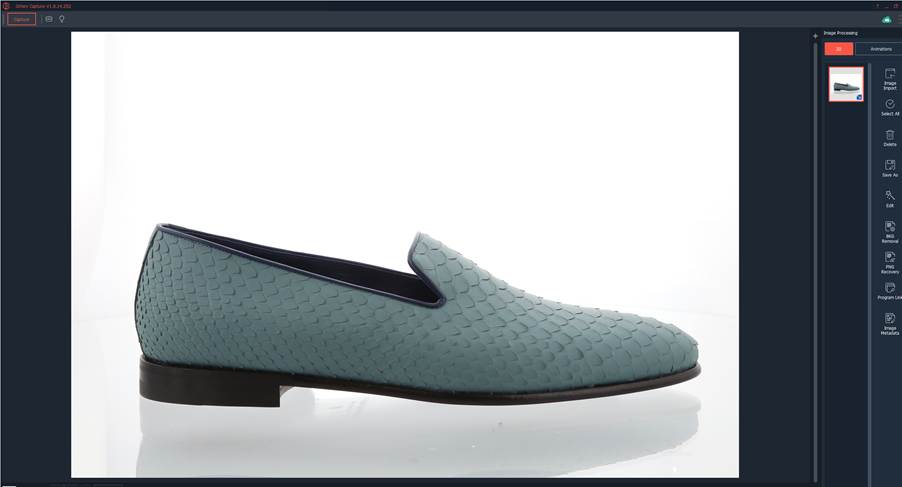
HOW TO POSITION THE SAMPLE CORRECTLY IN THE PACKSHOT:
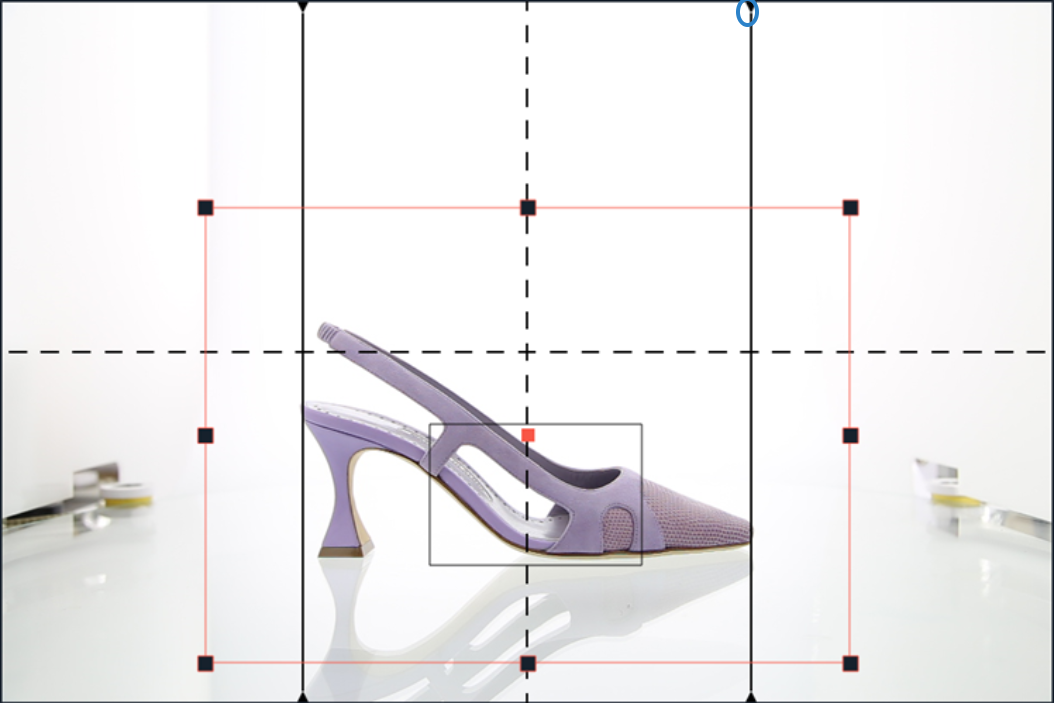
Place the shoe facing front making sure is in the middle
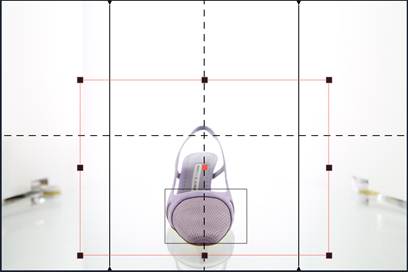

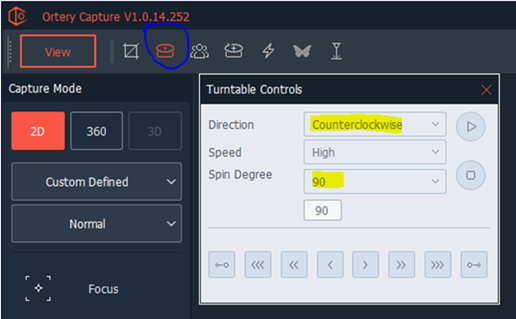
On the top left, click the icon to open the turntable control and set as follow:
Direction: Counterclockwise
Spin degree: 90
And then press play.
The shoe will start to rotate ending up facing on a side position
Manually move the shoe in a center position.
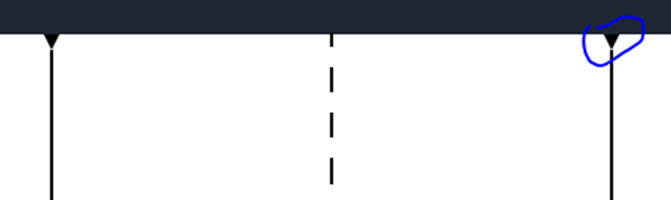
Adjust the guidelines by dragging them using the black arrow, to include the shoe between them
The top camera will be needed later when taking the 20 shots, it is not needed to adjust it at the beginning.
The top camera is also called TOP VIEW meanwhile the frontal camera is called the FRONT VIEW.
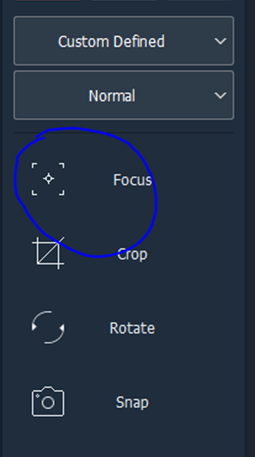
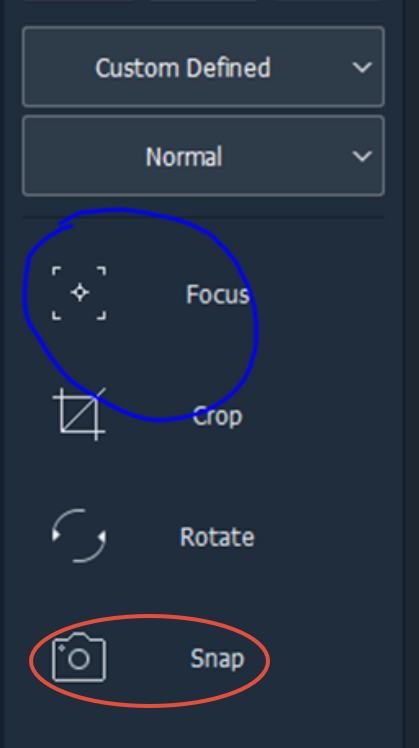
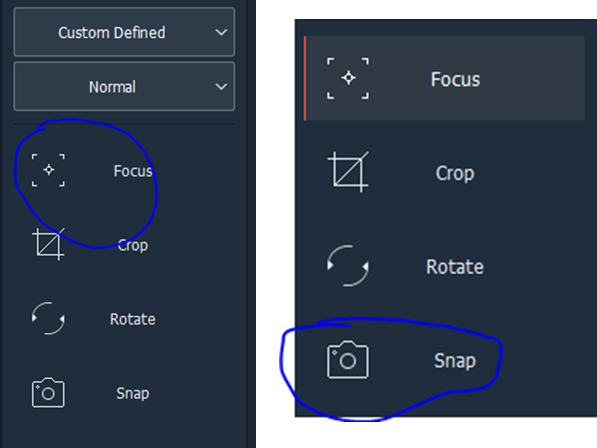
Back to FRONT view move the small black rectangular box in the center and press Focus.
HOW TO TAKE SIDE PICTURE (TIFF AND PSD)
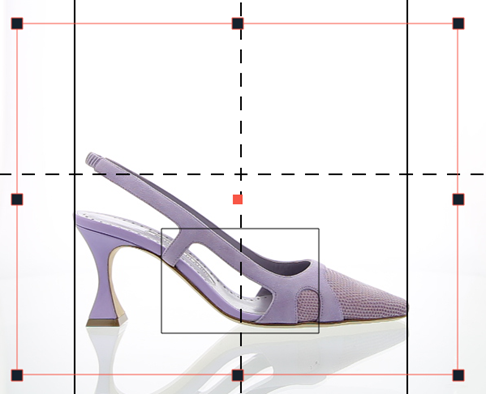
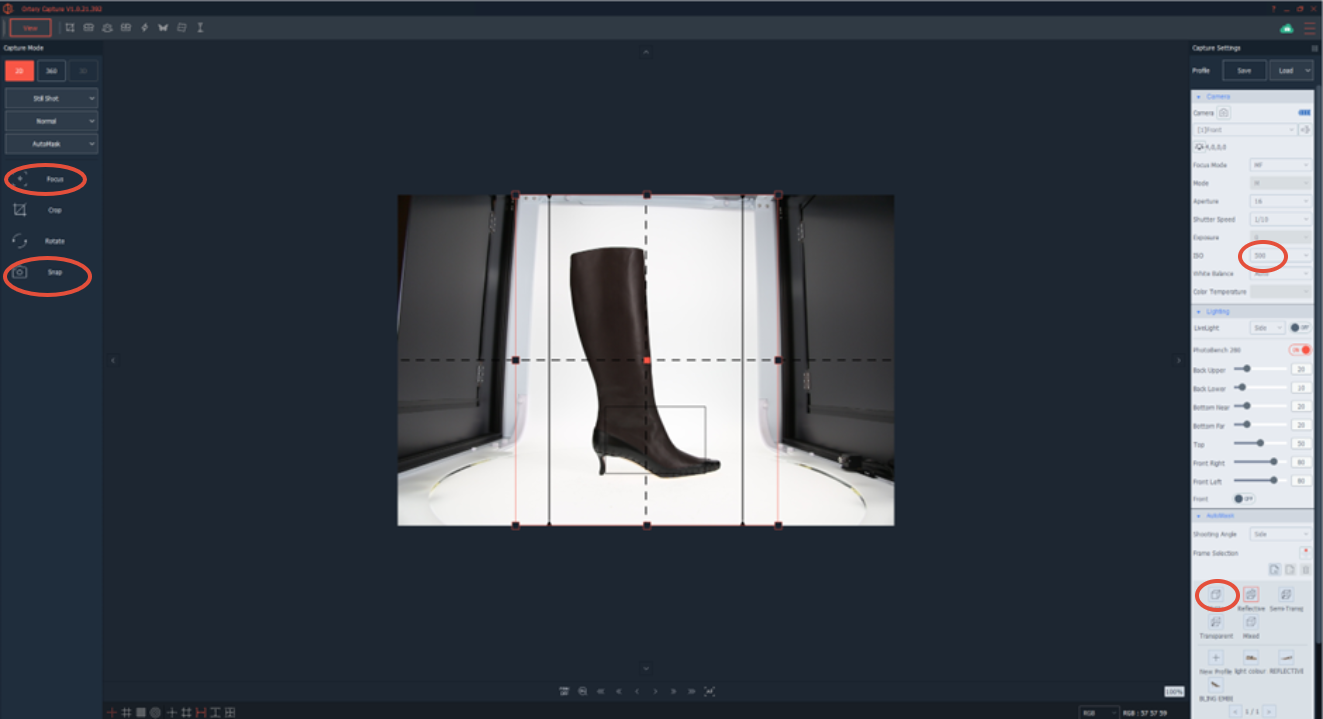
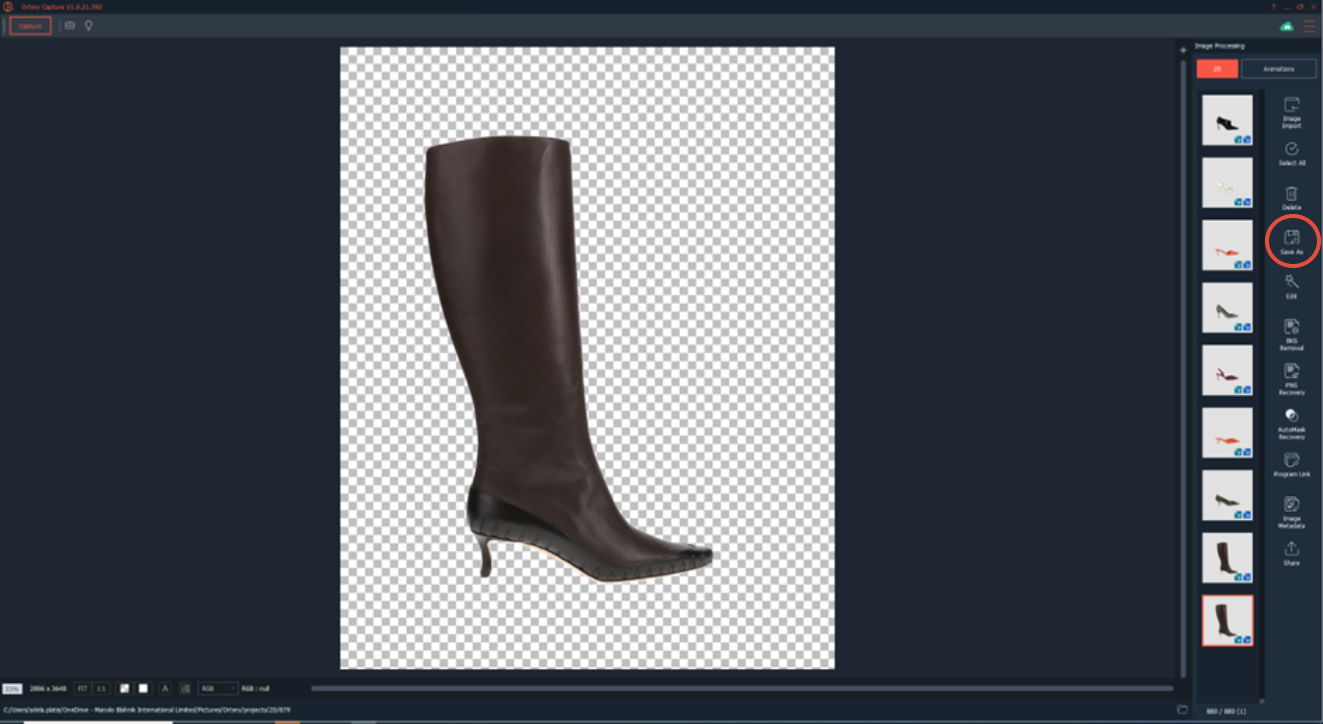
Once opened and profile set up, it should look like this. We always start with the side picture (the TIFF and PSD file), when you are in Still Shot, you need to make sure you are in Auto Mask
When changing set up from Normal to Automask, the screen will get suddenly dark because it changed profile. When taking pictures you always need to use Profile 1. To make sure you are on this profile, go to Load and select Profile 1
To take the picture, you need to improve the overall look of the picture. Change the ISO from 250 to 350, 400 or 500, you need to pick the ISO that makes the sample look closest to reality. In general, for very dark colours you need to set it on 500.
Change the AutoMask setting depending on how the sample looks like:
- Suede sample –Matte
- White colour sample-Light colour
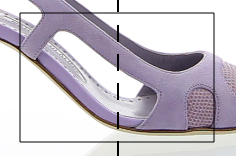
Make sure the sample is positioned in the middle of the rotative table, it need to be on a side profile, use the black guidelines to make sure you are in the centre of the capture, you can move them as well depending on how big the sample is
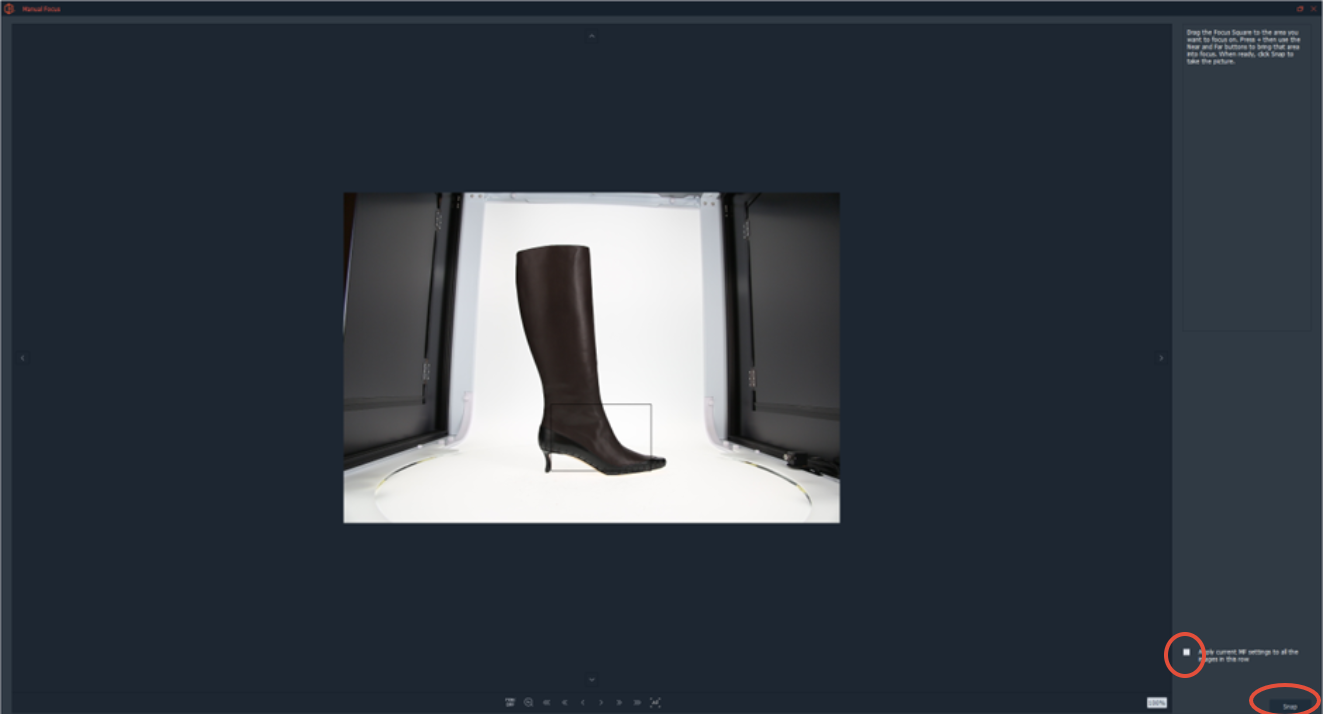
Once positioned correctly, Focus and Snap
On the left you can see how much is masking and it can happen that the sample is not fully captured. In this case, we need to reset the mask, and with the dragging point, we can adjust the mask. The arrow needs to be usually in the middle zone of the line.
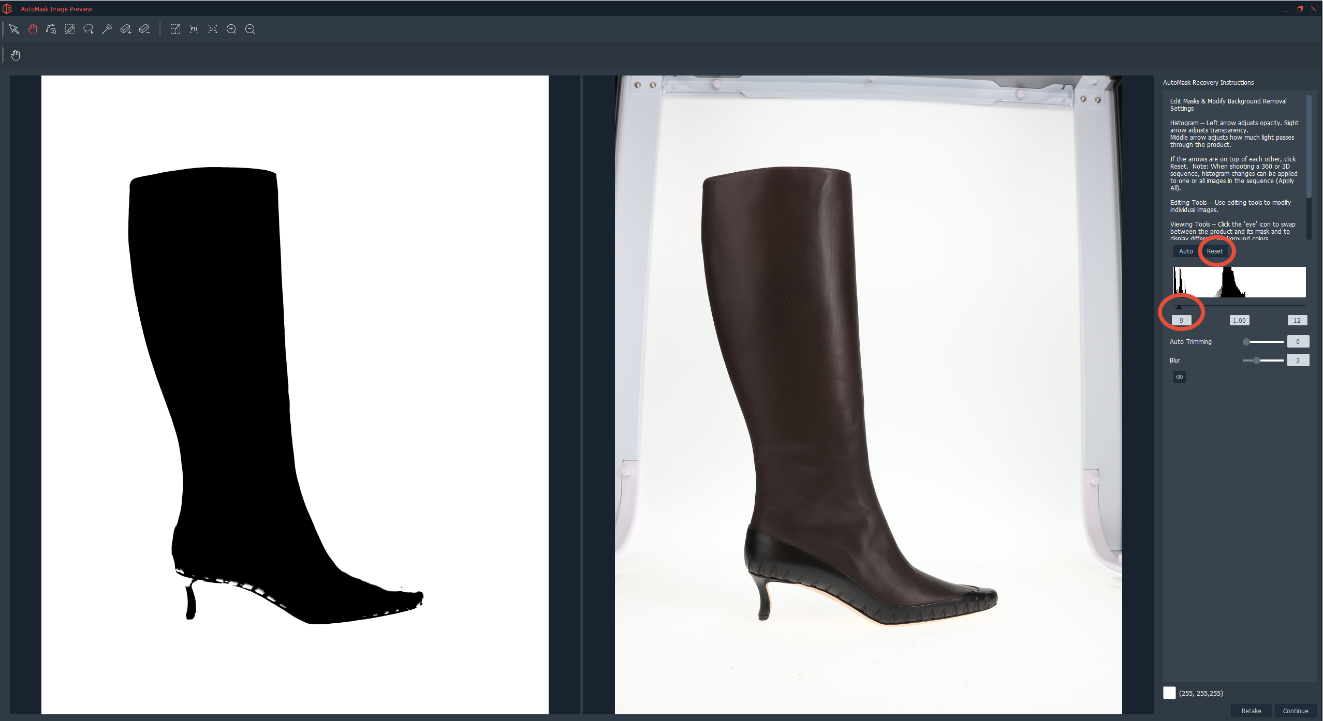
The mask should look like below. To check how it would look like, you can always do a preview from the little eye
You can also use the tools in the top bar to manually adjust the mask

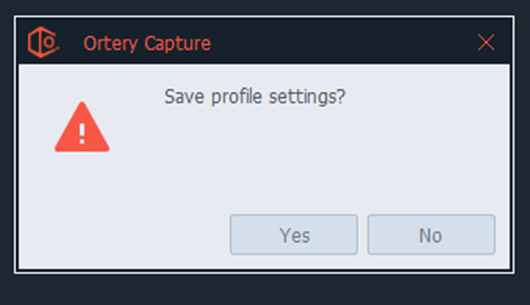
Once you are happy with the mask and the preview, you can press continue to save the TIFF and PSD
Do not save the profile as the profile has already been saved- it’s the Profile 1
The mask should be something like below, you can save it from the Save As
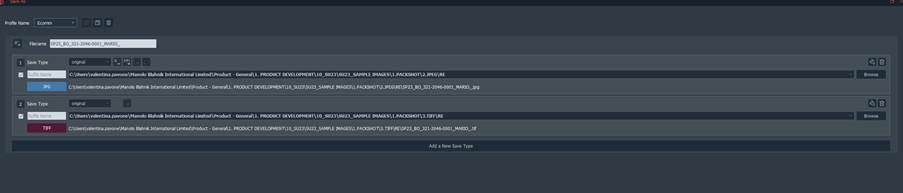
To save the pictures for Still Shot:
- Select profile name: PD
- Filename will always be created as follow:
SEASON_FACTORY INITIALS_PRODUCT ID_SAMPLE NAME_
- The save type are always:
1 – NOT TO USE(make sure is always unticked)
2 – TIFF
3 – PSD
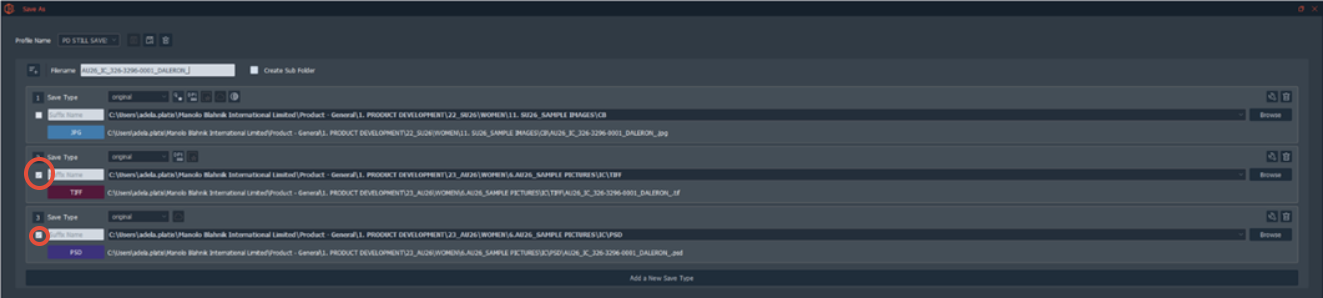
OBS: The folders that will save in the One Drive have a tick turned on
And then press save
When all the pictures have been saved, press finish and move to the next one
Select Capture to go back to the main menu
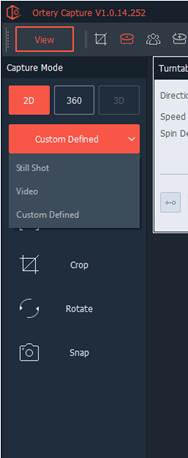
HOW TO TAKE 20 PICTURE (20 SHOTS AND 5 VIEWS)
The sample is already in position after the Still Shot, you only need to change the set up for it from Still Shot to Custom Defined and the AutoMask to change it to Normal. Focus and Snap.
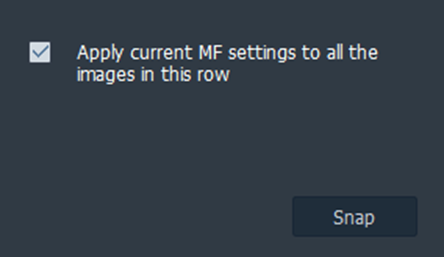
A window will pop-up. Tick the box to maintain the settings on all the picture and click again snap
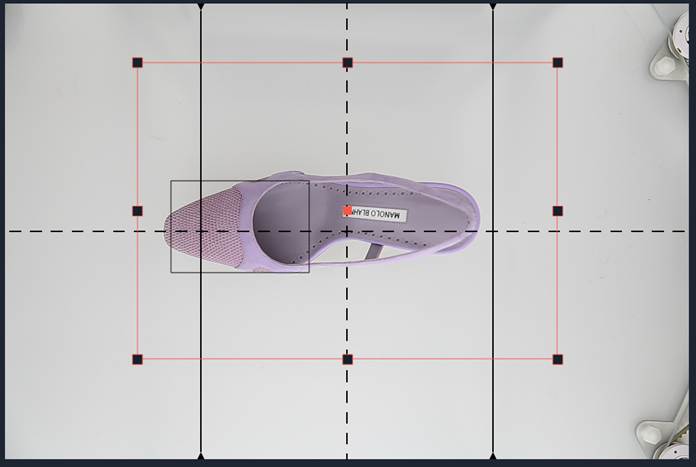
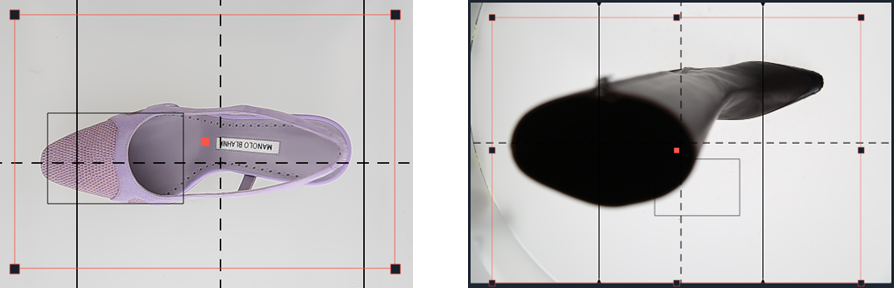
On the 19th picture, the view will be automatically changed allowing you to take a picture from above.
If necessary, move the rectangular box as show below. Click focus and snap.
OBS: For Boots, the top picture does not look great, but take the picture anyway, trying to capture the whole shoe if possible
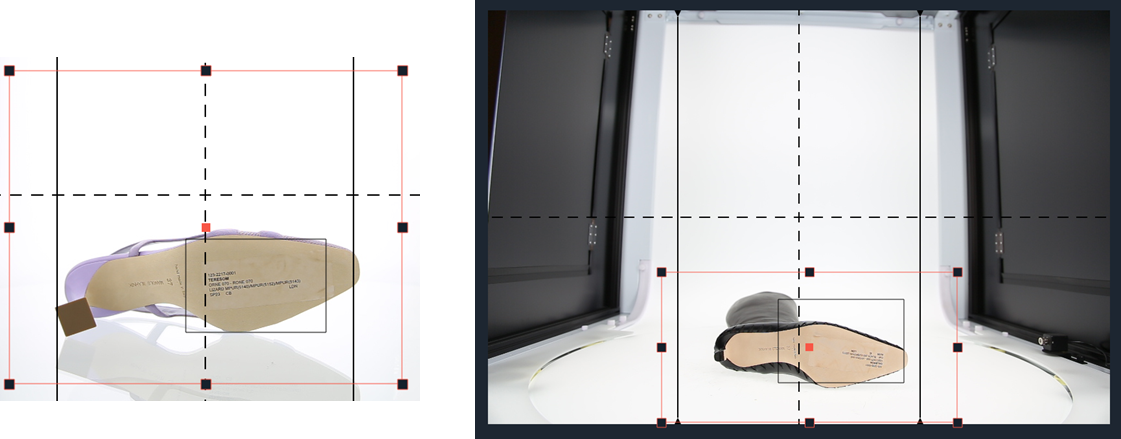
For the 20th picture picture move the shoe to take picture of the sole.
Move the black rectangle (focus frame) on the label. Focus and snap.
If you are unhappy with any of the picture, you can select it from the gallery and press the button “retake”
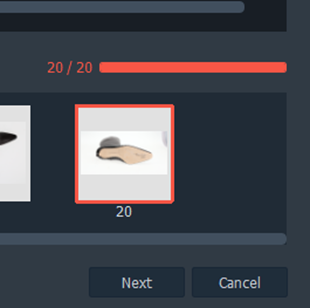
Once done, press “next"
To save the pictures for Custom Defined:
- Select profile name: PD
- Filename will always be created as follow:
SEASON_FACTORY INITIALS_PRODUCT ID_SAMPLE NAME_ (the name should already be saved from the Still Shot view)
- The save type are always:
1 – 38 shot (they have the tick on)
2 – 5 views (they have the tick on)
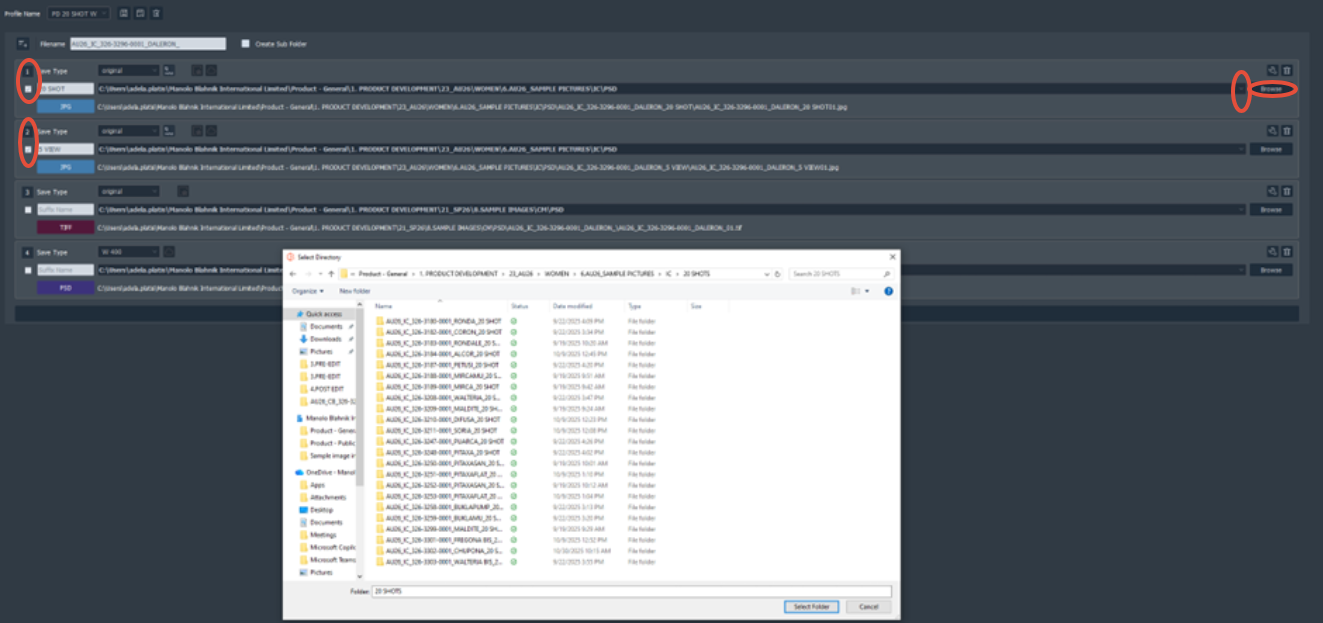
Use the arrow and the browse to find the folder you want to save in
And then press save
When all the pictures have been saved, press finish and move to the next one

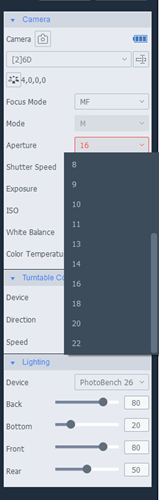
ISO
To get the best results in term of color is best to use the
14 – For dark colors shoes
16 – For all colors shoes
18 – For white/clear shoes
16 is a good aperture for almost all the samples. 14 for black/navy and dark brown samples. 18 for pure white and clear pvc samples
Aperture
If the ISO is not quite right, you can also change the Aperture, but only in particular cases, try to only change the ISO.
The aperture is set up to the level that would give best results
HOW TO TAKE ONE SINGLE SHOT
If you need to take just one picture you can change the capture mode to still shot
Once you take a picture the gallery will open. You can take as many different pictures as you want.
Click “save as”.
If you have different pictures of the same article, select all of them and press “save as” icon.

This time the Profile name will be Ecomm.
For the file name you have to follow the same rule as before
Save type will be:
1 – JPEG
2 - TIFF
Once saved, you can delete all the pictures

Always check that the cloud have finished to sync before shut down the computer.

SAVING THE IMAGES:
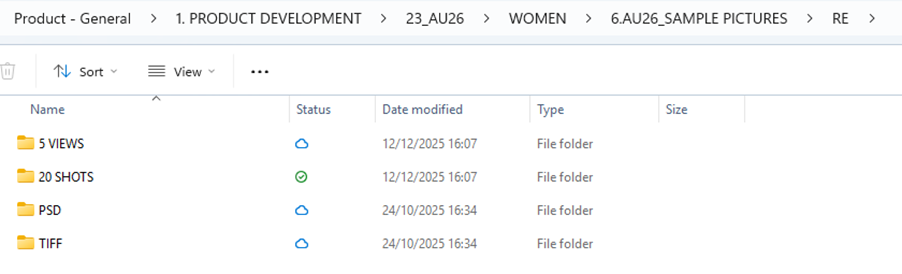
Before saving the images we need to have the images folders set up by factory like below:

Each factory should have the following folders:
Each file must have the same name, please see below how to name each sample saved:  SEASON_FACTORY_PRODUCT ID_STYLE NAME_